Winter is the rainy season around here. At least, it’s supposed to be. Historically, by this time of year, rains starting in October would have totaled 10 or 12 inches by now. This year, we’ve hardly had 2 inches. Add that to a dry season last winter, and it’s looking to me like an increasingly serious drought.
Anyway, I’ve been taking the opportunity of the mostly dry days in the last month or so to prepare for the rain I know (or hope) will come eventually. I’ve agonized over rainwater collection strategies since we first moved here, trying to figure out how to collect the huge volumes of rain that (usually) fall on our house and garage roofs each winter, store it, and move it (slightly uphill) out to the vegetable and grain beds out back. Every potential solution I’ve come up with has required lots of time, lots of energy, and lots of money – in other words, projects which will have to wait for another day.
I finally decided that the best thing to do in the short term is to try a few smaller, more manageable projects that get at the issue in different ways, and see how they work. I’m thinking about it as a modular, incremental approach: If I can collect, store and use some water successfully with a modestly sized project now, then in the future, maybe I can repeat the project with variations, or expand it to collect more water. With that in mind, I took on two projects: (1) a small pond to directly collect rain as it falls from the sky; (2) a 300-gallon tank to collect rainwater from a portion of the house roof.
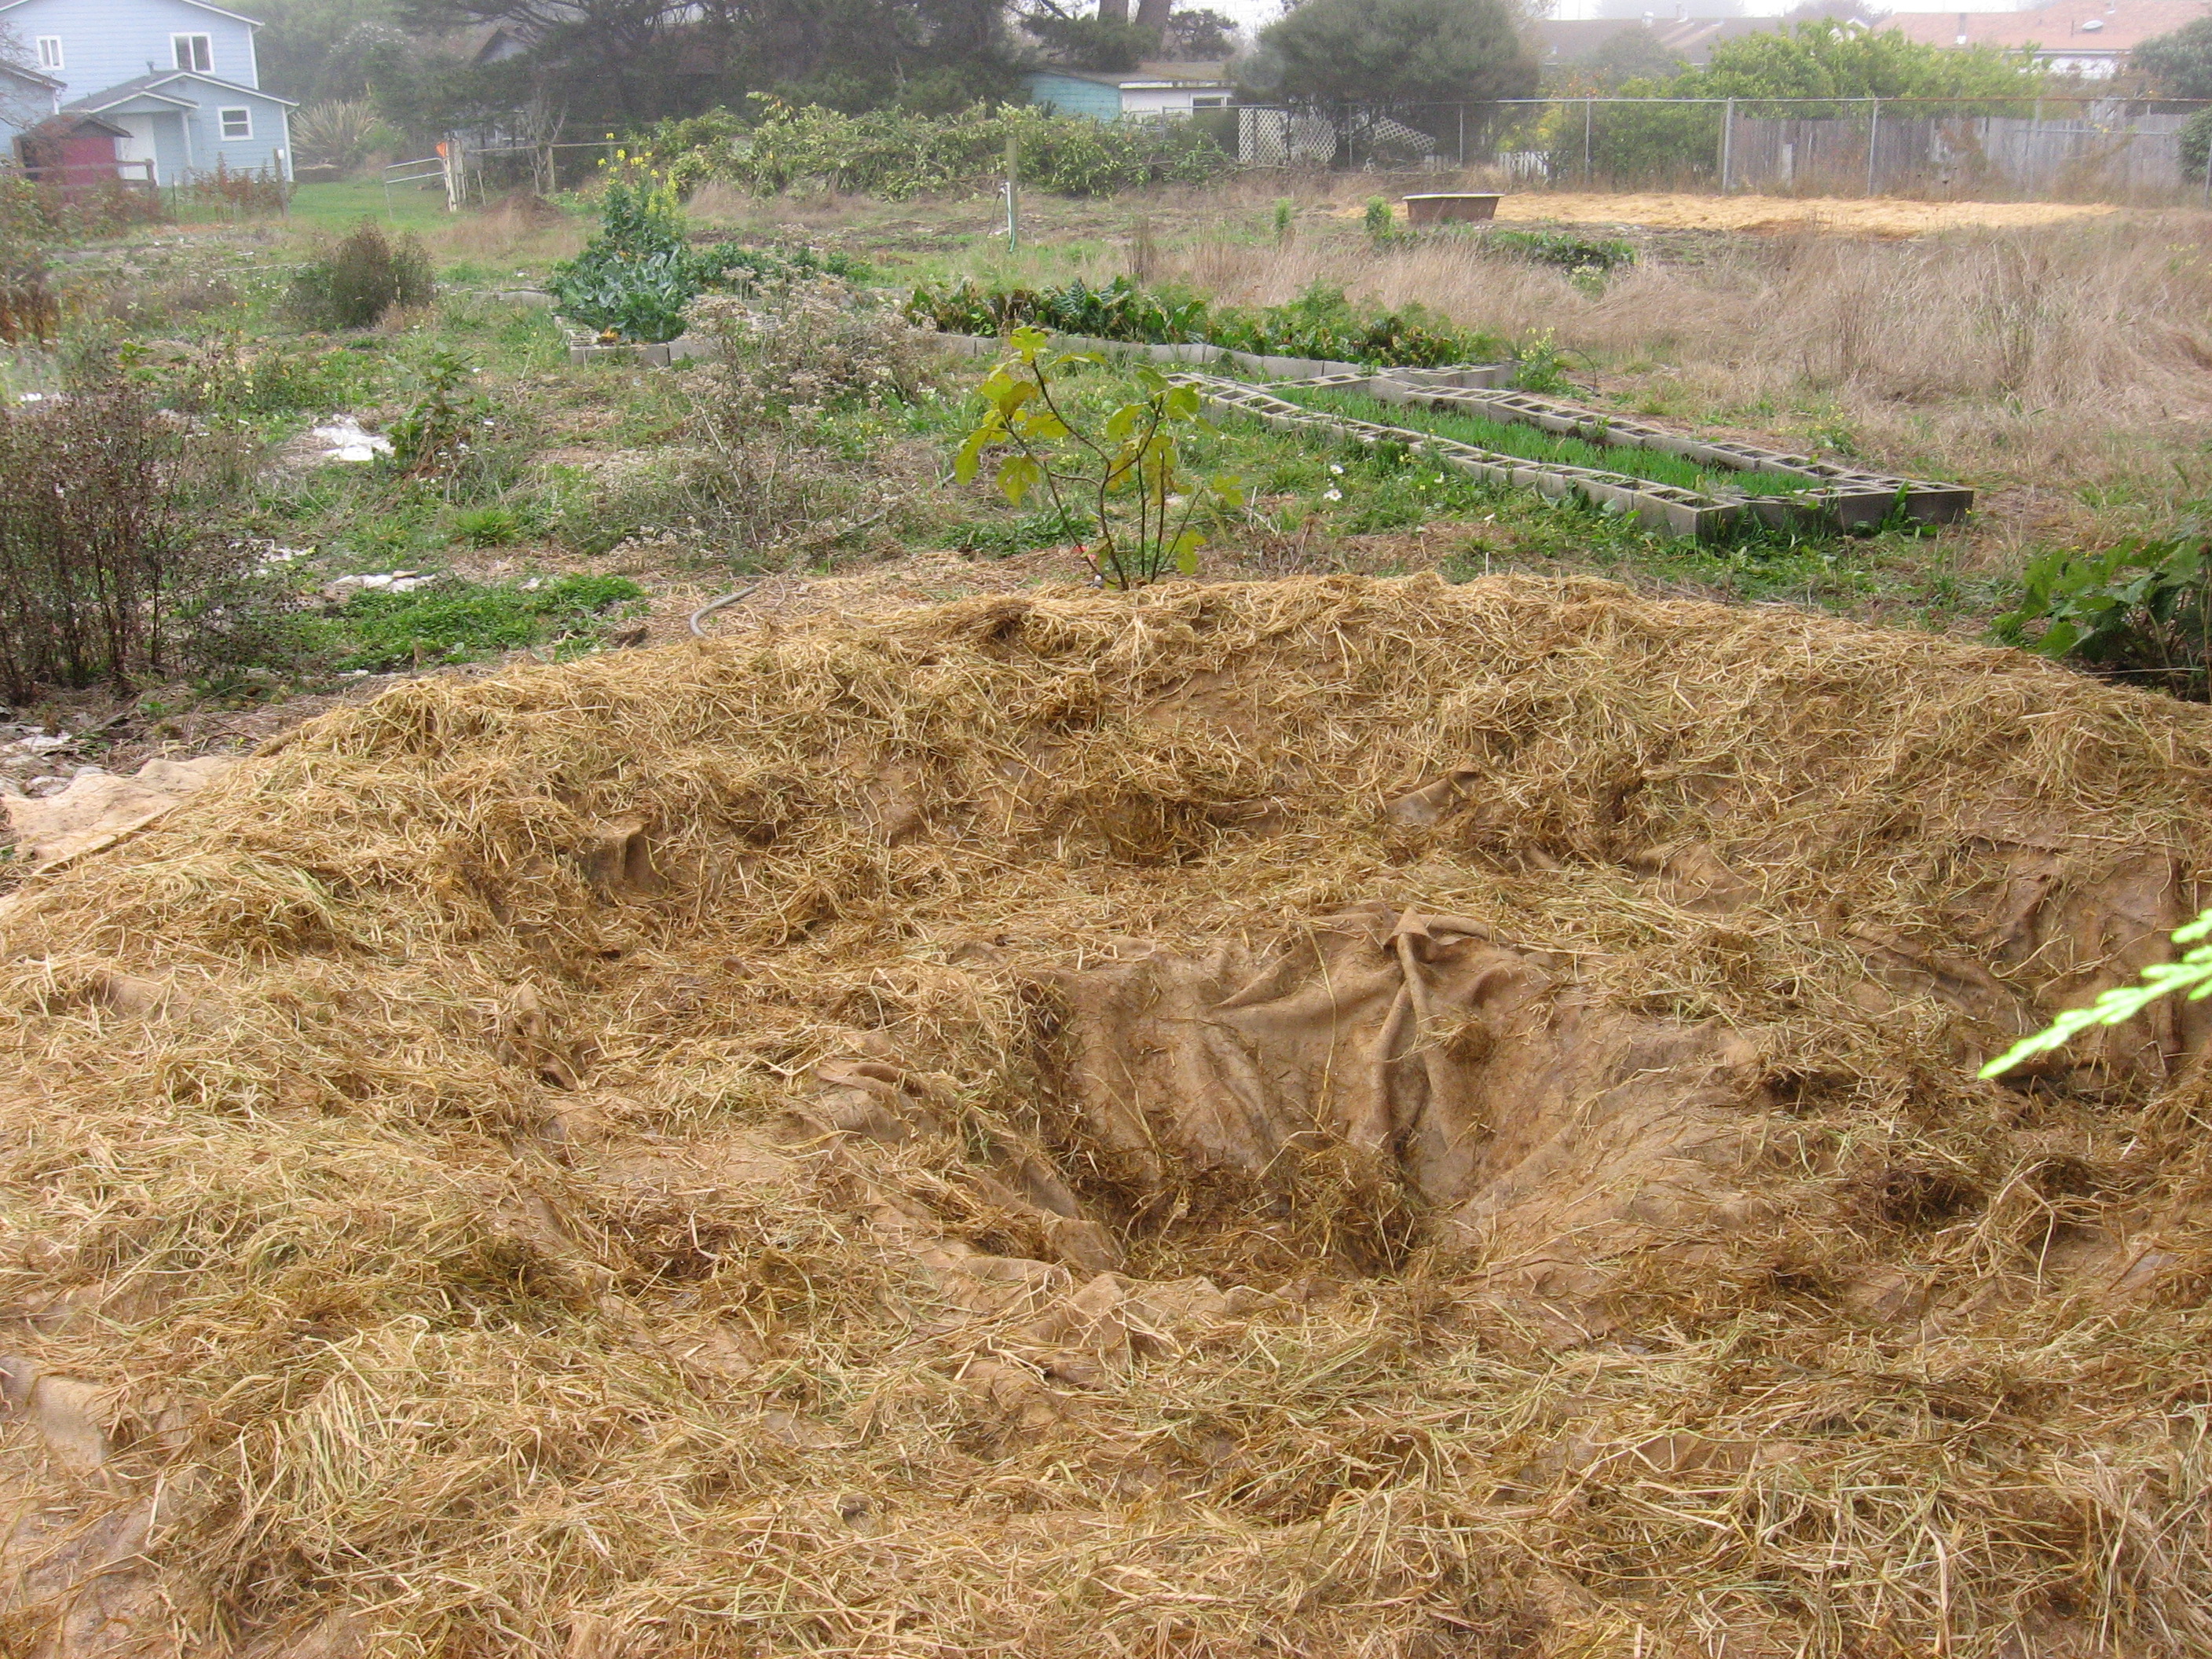
The pond is located far from the house and garage, on the far side of the vegetable beds and orchard, near the western edge of our property. This puts it at almost the highest elevation on the property. The slope of the land is so slight that it’s barely noticeable, but it’s enough that the water knows it’s there! My idea was to place a water collection feature in a location where I could use gravity to feed the water to vegetable beds or perennials. Here’s what it looked like shortly after my friend Levon and I dug it:

It’s circular, about 12 feet in diameter. Most of it is very shallow, with the exception of a slightly deeper depression in the center. The plan is to use a hand-operated siphon pump to get the water over the berm which contains it, then let gravity move it down a length of hose to quickly soak whatever I want to water at the end. Because the slope of the land is so slight, the pond couldn’t be very deep, or most of the water would end up below the level of most of the vegetable beds and the siphon wouldn’t work! The deeper portion in the center I will leave full year-round, hopefully attracting some frogs and other water-loving wildlife to the garm.
Because my soil is sandy and fast-draining, the pond had to be lined with a plastic liner. This is a potential impediment to scaling up surface water storage – which should be the cheapest, easiest and most practical method of water storage in this cool, foggy climate – both because I don’t like the idea of spreading all that plastic around, and because pond liners are really expensive! In any case, I took the plunge this time. I covered the liner with some old, moldy burlap which Levon had lying around, and sprinkled some straw and oat seed over that. Protecting the exposed liner from the sun should extend its life substantially, and the burlap and straw will rot, the oats sprout, and hopefully jump start some good microbial activity in the pond. I still have to figure out if there’s a good way to aerate the water and avoid a stinky, anaerobic, “bad” microbe situation.
With Levon’s help, the pond was dug and liner laid in only a few hours. The other project turned out to be a bit more ambitious. The idea here was to place an elevated water tank just outside the back door of the house, use it to collect rainwater from the gutter, and have it gravity-feed directly into a tub or sink for washing vegetables from the garm. To date, we have been washing our veggies in a utility sink in the laundry room/mud room (just inside the back door), but that ends up washing a huge amount of dirt and organic matter down the drain and into the sewer system, and uses quite a lot of city water. With the new project, we can use rainwater to wash veggies, and then collect the dirty water in buckets placed under the sink drain and use it to water our plants again! (I’m even thinking about using that water to refill the pond when it’s not at capacity.)
It’s a good thing that Levon and I agreed to a work trade recently (helping each other out with projects on an hour-for-hour basis) and that he is such a patient teacher of the many practical skills he has and I don’t, such as carpentry and plumbing. Without him, I would never have been able to successfully complete this project. But with his help, and after many iterations of the original plan, three work days, and seemingly endless trips to hardware and plumbing stores, I now have a beautiful system in place that exceeds any expectations I originally had for it. Even with the free labor, it ended up being a much more expensive project than I had anticipated, but I’m happy with the result, and with what I learned in the process.
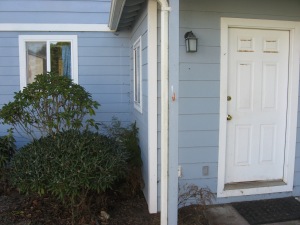
Before the Water Tank Project
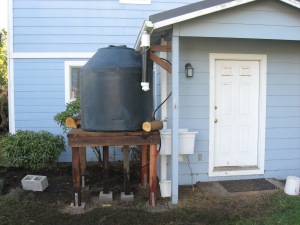
After Water Tank Project
The tube hanging from the gutter is a “first flush” device. At the beginning of any rain event, the first couple of gallons to come off the roof and through the gutter pour directly into the tubing. Hidden inside is a floating plastic ball, which seals off the chamber when it fills with water. That causes the water to then flow through another pipe (which is directly behind the first flush device and thus invisible in the picture) into the tank. This mechanism is designed to keep the “first flush” of rainwater, which is likely to contain contaminants which have settled on the roof since the last rain, out of the storage tank. At the bottom of the device is a small valve which slowly releases the collected water, drop by drop, after the rain, so it doesn’t even have to be emptied by hand!
The deck is made out of redwood, which seemed to be the best option for lengthening its life out in the elements without using chemically treated lumber. We made it as strong as we could (300 gallons of water weighs 2500 pounds!) and attached some large chunks of wood around the tank in an attempt to discourage it from “walking” off the deck and falling into the side of the house during a large earthquake.
Directly to the right of the tank in the picture, by the back door, you can see the sink. A bucket is set underneath the open drain. It’s a perfect vegetable-washing situation.
Now all we need is rain!